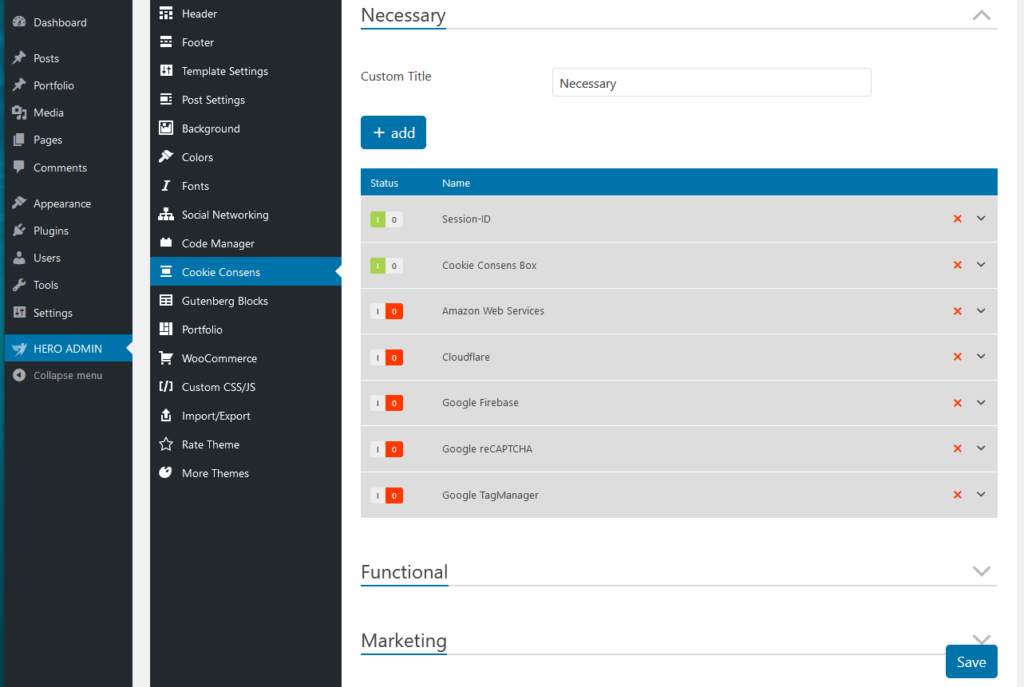
4 Cookie Consens categories are integrated in HERO ADMIN. This allows you to quickly and easily obtain the consent of your website visitors and is legally on the safe side.
Navigate to HERO ADMIN > Theme Panel > Cookie Consens, to Necessary, Functional, Marketing or Other.

What So These Categories Stand For?
- Nessesary – Necessary cookies help make a website usable by enabling basic functions like page navigation and access to secure areas of the website. The website cannot function properly without these cookies.
- Functional – These trackers enable basic interactions and functionalities that allow you to access selected features of our service and facilitate your communication with us.
- Marketing – Marketing cookies are used to track visitors across websites. The intention is to display ads that are relevant and engaging for the individual user and thereby more valuable for publishers and third party advertisers.
- Other – Other cookies are cookies that are not specifically assigned to one of the other 3 categories.
How Can The Cookies Be Managed?
The cookies in question can be managed very easily. First you can change the name of the category.
Below that all created cookies are shown. With only 1 click you can activate or deactivate, delete or change the content of the cookies.
The order can be changed easily by drag & drop.

How Can I Create A Cookie Item?
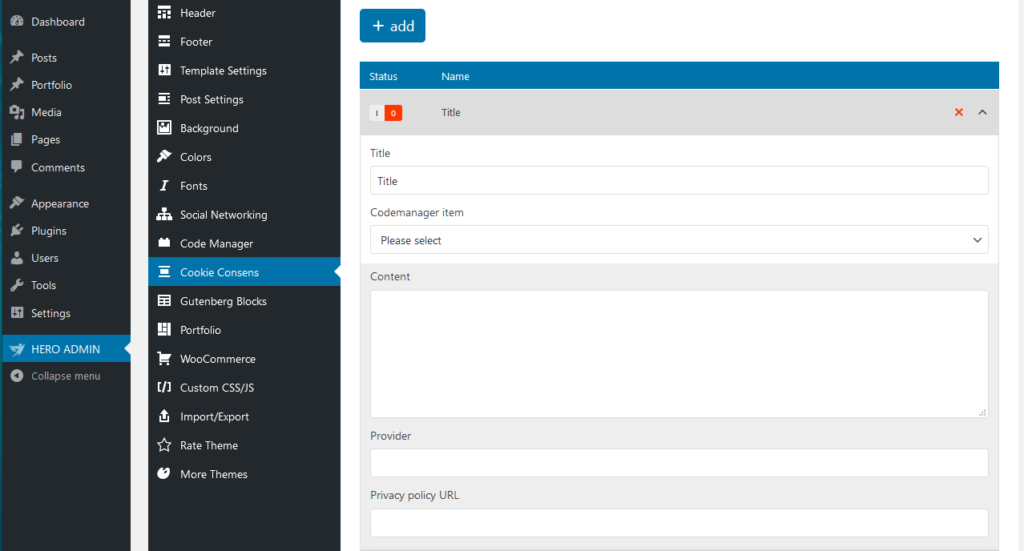
- Step 1 – Click on the Add button to create a cookie item.
- Step 2 – Assign a title, this should best be named like the cookie or the provider.
- Step 3 – No codes are stored in the Cookie Consens. These must first be entered in the Code Manager under HERO ADMIN > Theme Panel > Code Manager. If you have created the respective code, you can now select it at this point.
- Step 4 – Under Content you can display any test, which will later be displayed in the Cookie Consens Box at the cookie provider. It is a good idea to create an explanation what this cookie does or what it is needed for.
- Step 5 – Enter the exact provider name here.
- Step 6 – Enter here the exact URL to the privacy policy of the provider.
- Step 7 – Click the Save Setting button.
